
Why is hydronic balancing necessary?
An essential principle to understand is that water follows the path of least resistance. In a modern heating system, this resistance is determined by factors such as pipe length, pipe diameter, bends, valves, and the radiators or underfloor heating circuits themselves. Because there are more pipes and connections between the heat source and the most distant heat emitter, that part of the system has greater resistance and naturally receives less hot water.
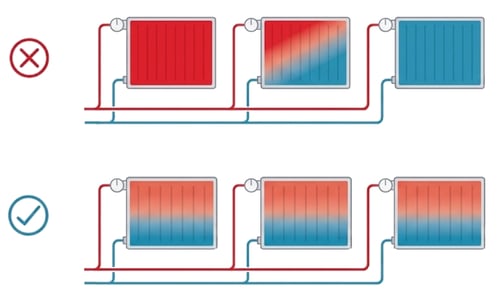
Without hydronic balancing, this can lead to:
- Comfort issues: Some rooms become too warm, while others remain cold.
- Higher energy consumption: The heat source (especially a heat pump) may need to provide unnecessarily high supply temperatures to heat the colder circuits, reducing efficiency.
- Faults: If multiple heat sources are connected to the system, imbalances in temperature can cause faults.
Hydronic balancing means distributing the water flow across the different heat emitters so that every room receives sufficient heat. One practical method is to compare the return temperatures of the different heat emitters.
Adjusting the resistance of a heat emitter
The resistance of a specific heat emitter can be adjusted in several ways. An overview is provided below.
Lockshield valve
A lockshield valve can be installed on all heat emitters.
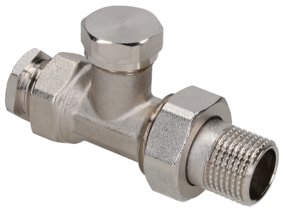
The cap on top can be unscrewed, allowing you to turn the screw underneath in or out. This restricts the water flow and thereby increases the resistance through that part of the heating system.
Radiator valve
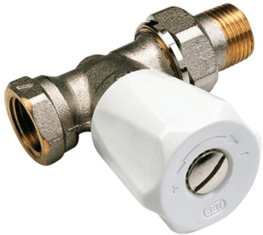
A radiator valve works in a similar way to a lockshield valve. However, you do not need any tools to adjust it; you can simply turn the control knob.
A radiator valve is often located on the supply pipe of a radiator.
If a heat emitter has both a lockshield valve and a radiator valve, hydronic balancing using the lockshield valve is preferred. The radiator valve should then only be used for small adjustments during everyday use, for example if a room receives a lot of sunlight and therefore requires less heating.
Thermostatic radiator valve
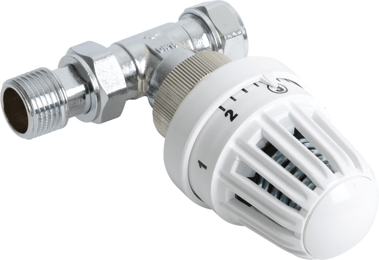
A thermostatic radiator valve is similar to a standard radiator valve. However, instead of being controlled only by hand, it responds to the temperature in the room. The warmer the room becomes, the more the valve restricts the water flow.
The thermostatic radiator valve can be set to different positions, which correspond to specific temperatures depending on the brand.
Thermostatic radiator valves are intended for temperature control in individual rooms, not for permanently hydronically balancing the system. In a well-designed system, there is therefore a thermostatic radiator valve on the supply side and a lockshield valve on the return side of the heat emitter.
Central heating manifold
This is similar to an underfloor heating manifold, except that radiators are connected to it. These manifolds often have a simpler design than underfloor heating manifolds.
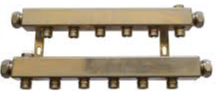
The advantage of this type of manifold is that hydronic balancing is very easy because the return connections for all heat emitters are located close together.
Depending on the installation, there may be lockshield valves at each connection point (as on the manifold shown below), or they may be located at the radiators themselves.
Underfloor heating manifold
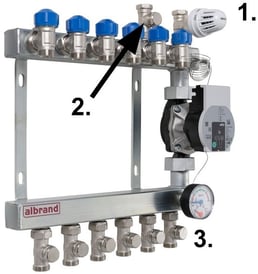
Underfloor heating manifolds come in many different types and sizes, so there are often several points where they can be adjusted. In the image above, the resistance can be adjusted at the following points:
- Thermostatic valve – Similar to the valve on a radiator; it restricts the supply of hot water to the floor. This increases the resistance of the flow towards the floor.
- Return lockshield valve – On underfloor heating manifolds, this lockshield valve restricts the heating water leaving the manifold.
- Circuit lockshield valve – This manifold also has return valves on each circuit. This allows the flow to be adjusted individually for each circuit/room. This is similar to having a lockshield valve on each radiator. On some manifolds, this adjustment can also be made using control knobs on the return side (the blue knobs in the image).
The hydronic balancing process: the temperature method
The balancing process described here is a practical method that is relatively easy to carry out yourself. There are many other, more comprehensive methods. For more information, you can refer to Danfoss’ useful guide to hydronic balancing or Heat Geek.
This process also explains how to rebalance the entire system from scratch. That is quite a significant step. If your heating system is already largely set up correctly and you only want to optimize it slightly, skip step 4c of the preparation.
A. Preparation
- Visual overview: Although not strictly necessary, a schematic overview of the heat emitter circuits is useful for identifying which circuit is the first and which is the last in the system.
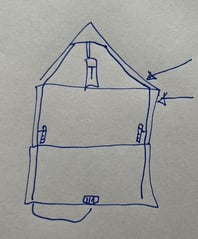
- Timing: It is best to carry out hydronic balancing on cooler days (around 10 to 15°C outside), when there is a significant difference between the supply temperature and the outdoor temperature. However, avoid doing this when it is so cold that the heat pump frequently enters a defrost cycle.
- Bleeding: Make sure the heating system has been properly bled. Air in the heating system can cause cold spots and poor water flow, which can interfere with the balancing process.
- System settings:
- Set the heat pump’s heat curve to a fixed temperature that suits the heat distribution system and the current outdoor temperature. If you are balancing the system when the outdoor temperature is 15°C, we recommend setting the
Fixed supply temperatureto 35°C. - Set the thermostat high (25°C or higher) so that the heat pump starts heating. Make a note of the time you do this.
- Fully open all heat emitter circuits, including the lockshield valves.
- Close as many internal doors as possible so that each room heats up independently.
- Set the heat pump’s heat curve to a fixed temperature that suits the heat distribution system and the current outdoor temperature. If you are balancing the system when the outdoor temperature is 15°C, we recommend setting the
- Warm-up time: Wait until the heating system has reached temperature. For the heat pump, we recommend waiting at least 20 minutes after it starts.
Hydronic balancing with two heat sources
The steps above assume a heating system with a single heat source. In this situation, there is one heat emitter that heats up the fastest. In a system with two heat sources, such as a hybrid setup with a heat pump and central heating boiler, there are two points in the system that heat up the fastest.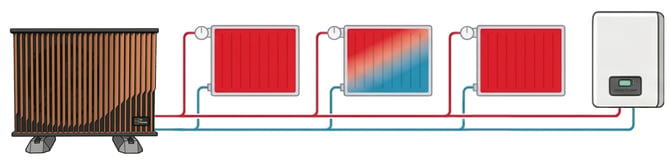
It is important to keep the following two points in mind:
- Because the heating water is continuously moving, splitting, and merging again, it is also continuously being mixed. Once the heat emitters have been properly balanced to achieve similar return temperatures, this means that the usually warmer water from the central heating boiler is quickly mixed with the water from the heat pump. In practice, you will not notice that the two heat sources are each adding their own heat to the system.
In a typical system where the heating water flows at 18 L/min through pipes with a diameter of 20 mm, the water travels through the pipes at approximately 57 metres per minute. This means that in a typical system with 150 to 200 metres of pipework, the heating water circulates throughout the entire home within approximately 2 to 4 minutes.
- The heat pump adjusts its pump speed to the central heating boiler, and our pumps can modulate down exceptionally far. The heat pump reduces its pumping speed so that both systems can circulate their water properly through the heating system.
With the above in mind, we recommend carrying out hydronic balancing while only the heat pump is running. During installation, the central heating boiler is already configured to circulate water at a high rate. In practice, this means that the heating water will mix effectively once the heat emitters have been properly balanced.
Balancing with a Pomp T
Do you also have a Pomp T? Then the overall process of hydronic balancing stays the same. However, the best moment to balance the system depends on how the Pomp T is connected.
Pomp T in series
All heating water from the heat emitters first comes back together and then flows through the Pomp T. As a result, the Pomp T has no effect on how the water is distributed. You can therefore balance the system following the step-by-step plan above.
Pomp T in parallel
The circulation pump of the Pomp T has the greatest effect on the heat emitters connected closest to it. It is therefore best to balance the system while both the monobloc and the Pomp T are running.
To make sure the Pomp T is running while you balance the system, you can:
- set the Pomp T setpoint low a few hours in advance, and raise it as soon as you start balancing;
- balance the system right after a lot of hot water has been used, for example after showering.
The Pomp T will then switch on to heat the water back up.
Afterwards, check the system once more at a time when only the monobloc is running for space heating, and make adjustments where needed.